Ryobi Drill User Manual: A Comprehensive Guide
Ryobi drills‚ available at Home Depot‚ require knowing the model number for registration or parts ordering. This manual provides comprehensive guidance for optimal usage.
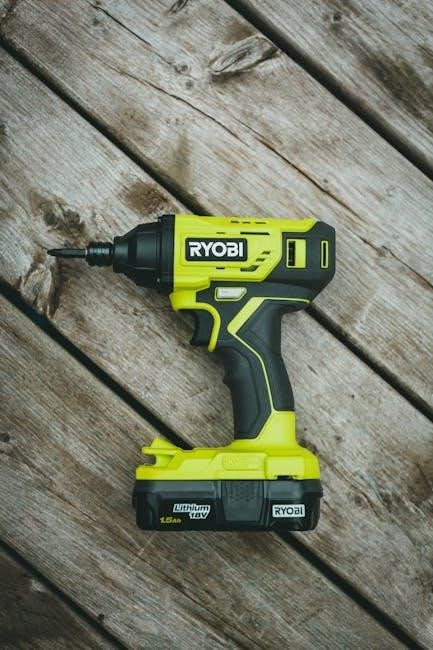
Understanding Your Ryobi Drill
Ryobi drills boast diverse features‚ necessitating familiarity with your specific model. Locating the model number is crucial for registration‚ accessing support‚ and ordering replacement parts. Ryobi consistently places this identifier in a readily visible location on the tool itself. Understanding the model code – like PBLHM102 – unlocks insights into its capabilities and features‚ ensuring you maximize its potential for various tasks.

Identifying the Model Number
Finding your Ryobi drill’s model number is straightforward. Ryobi strategically places this vital information directly on the tool’s housing for easy access. Typically‚ it’s located on a label‚ often near the battery compartment or on the base. This number‚ such as PBLHM102‚ is essential for registration‚ parts ordering‚ and accessing specific user manuals.
Safety Precautions
Prioritize safety when operating your Ryobi drill. Always wear appropriate eye protection to shield against debris. Secure workpieces firmly to prevent movement during drilling. Disconnect the battery before making adjustments or changing bits. Never operate the drill with damaged parts‚ and inspect it regularly for wear.
General Safety Rules
Maintain a clean and well-lit workspace‚ free from obstructions. Keep bystanders at a safe distance during operation. Avoid loose clothing or jewelry that could become entangled. Never force the drill; let the tool do the work. Always unplug the battery pack when not in use‚ and before servicing.
Battery Safety Guidelines
Only use Ryobi-approved chargers and batteries for optimal performance and safety. Never disassemble or modify the battery pack. Avoid exposing batteries to extreme temperatures or direct sunlight. Do not incinerate batteries‚ even if damaged. Properly dispose of used batteries according to local regulations to prevent environmental harm.
Drill Components & Features

Ryobi drills boast a variety of features enhancing usability. Key components include the chuck‚ variable speed trigger‚ and ergonomic handle. Modern models often feature brushless motors for increased efficiency. Understanding these parts is crucial for maximizing drill performance and ensuring safe operation during various tasks.
Key Parts of the Ryobi Drill
Essential components include the chuck‚ securing drill bits‚ and the motor providing power. The battery compartment houses the Ryobi One+ battery‚ while the variable speed trigger controls drilling speed. The handle ensures a comfortable grip‚ and the clutch adjusts torque for screw driving. Familiarize yourself with each part!
Variable Speed Trigger & Control
The variable speed trigger regulates drilling speed; pressing it lightly initiates slow speeds for delicate tasks‚ while full pressure delivers maximum power. This control is crucial for working with diverse materials. Consistent pressure ensures smooth operation‚ preventing damage or stripping. Mastering this feature enhances drilling precision and efficiency.
Battery & Charging
Ryobi utilizes various battery types within the One+ system‚ ensuring broad compatibility across tools. Proper charging is vital for optimal performance and longevity. Use only Ryobi-approved chargers. Indicators display charging status – typically red while charging‚ and green when complete. Avoid overcharging to preserve battery health and lifespan.
Ryobi Battery Types & Compatibility
Ryobi’s One+ system boasts impressive battery compatibility. Batteries range in voltage (18V‚ 40V) and amp-hour (Ah) ratings‚ influencing runtime. Higher Ah provides extended use. All One+ batteries work with any One+ tool‚ offering versatility. However‚ tool performance may vary based on battery capacity. Ensure proper connection for safe operation.
Charging Procedures & Indicators
To charge a Ryobi battery‚ connect it to a compatible Ryobi charger. Charging indicators typically display red while charging and green when complete. Avoid extreme temperatures during charging. First-time charging may take longer. Use only Ryobi-approved chargers to prevent damage or safety hazards. Disconnect after charging is finished.
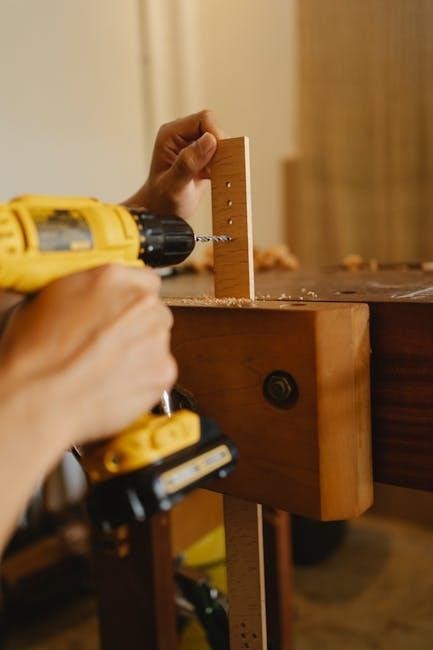
Operating Instructions
Before operation‚ ensure the battery is securely installed. To install or remove bits‚ utilize the chuck mechanism – twist to loosen and tighten. Select appropriate speed settings for the material. Drilling into wood‚ metal‚ or plastic requires varied techniques and bit selection. Always maintain a firm grip and proper body positioning during use.
Installing & Removing Bits
To install a bit‚ loosen the chuck by twisting it counterclockwise. Insert the desired bit fully into the chuck‚ ensuring it’s centered. Tighten the chuck securely by twisting clockwise until firm. For removal‚ reverse the process – loosen‚ extract the bit‚ and repeat as needed for different drilling tasks.
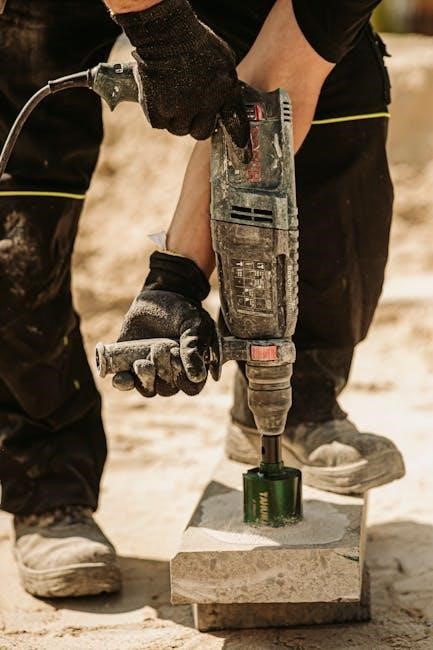
Drilling into Different Materials (Wood‚ Metal‚ Plastic)
When drilling wood‚ use wood bits at medium speed with moderate pressure. For metal‚ employ metal bits at a slower speed‚ utilizing cutting oil to prevent overheating. Plastic requires lower speeds and gentle pressure to avoid melting or cracking. Always select the appropriate bit for the material.
Clutch Settings & Usage
The clutch limits driving force‚ preventing screw over-tightening or stripping. Higher numbers indicate greater torque. Adjust the clutch by selecting a number; start low and increase until the bit drives screws effectively without damaging materials. Understanding clutch settings is crucial for precise screw driving and controlled drilling.
Understanding Clutch Numbers
Ryobi drill clutch numbers represent the amount of torque applied before the clutch disengages. Lower numbers are for delicate tasks‚ like driving screws into soft wood‚ while higher numbers are for tougher materials. Experiment to find the optimal setting; a higher number means more force is applied before slipping occurs.
Adjusting Clutch for Screw Driving
When driving screws‚ start with a low clutch setting and gradually increase it until the driver consistently seats the screw without stripping the head. If the clutch slips before the screw is fully driven‚ increase the number. Proper adjustment prevents damage to both the screw and the material being fastened.

Maintenance & Troubleshooting
Regular cleaning and lubrication are vital for optimal drill performance. Remove debris after each use and apply a suitable lubricant to moving parts. Common issues‚ like a drill not starting‚ often stem from a discharged battery or worn brushes. Inspect the chuck and bits frequently for damage or wear.
Cleaning & Lubrication
To maintain your Ryobi drill‚ routinely remove dust and debris after each use. A clean drill operates more efficiently and lasts longer. Apply a light lubricant to moving parts‚ such as the chuck and trigger mechanism‚ to ensure smooth operation. Avoid harsh chemicals; use a damp cloth instead.
Common Issues & Solutions
If your Ryobi drill isn’t functioning‚ first check the battery charge and connection. For GUI issues‚ inspect the cable and rail connections‚ potentially indicating a software or hardware problem. Insufficient lubrication can cause operational failures; ensure periodic oiling. If problems persist‚ consult the Ryobi website for support.
Advanced Features (Brushless Models)
Ryobi’s brushless drills‚ like the PBLHM102‚ offer enhanced performance and efficiency. Brushless technology minimizes friction‚ extending runtime and motor life. Optimizing performance involves utilizing the variable speed trigger and appropriate clutch settings for the task. These models deliver increased power and durability compared to brushed counterparts.
Benefits of Brushless Technology
Brushless motors in Ryobi drills eliminate physical brushes‚ reducing friction and heat. This results in significantly longer runtime per battery charge and an extended tool lifespan. They deliver increased power and more efficient operation‚ providing consistent performance under demanding conditions. Expect quieter operation and reduced maintenance needs too.
Optimizing Performance with Brushless Drills
To maximize your Ryobi brushless drill’s potential‚ use high-capacity batteries for extended runtimes. Select appropriate drill bits for the material‚ and utilize variable speed control for precision. Regularly clean the drill and check for worn components. Proper battery storage and charging habits also contribute to peak performance.
Ryobi One+ System Compatibility
The Ryobi One+ system allows seamless battery interchangeability across a vast range of tools. This versatility expands your tool collection without repeatedly purchasing batteries and chargers. Utilizing a single battery source streamlines your workflow and reduces costs‚ offering convenience and efficiency for all your project needs.
Expanding Your Tool Collection
Ryobi’s One+ system truly shines when growing your toolkit. Instead of buying separate batteries and chargers for each new tool‚ leverage your existing One+ batteries. From saws and sanders to lights and fans‚ a single power source fuels a diverse range of Ryobi tools‚ offering significant cost savings and convenience.

Using Batteries Across Different Ryobi Tools
The Ryobi One+ system’s core benefit is battery compatibility. Any Ryobi One+ battery works seamlessly with any One+ tool‚ regardless of voltage (18V‚ 24V‚ or 40V). This interoperability eliminates the need for multiple chargers and battery types‚ streamlining your workshop and reducing long-term expenses considerably.
Warranty Information
Ryobi tools are backed by a comprehensive warranty‚ offering peace of mind to users. Coverage typically includes defects in materials and workmanship for a specified period. To benefit from the warranty‚ registering your drill promptly after purchase is crucial. Retain your proof of purchase for any warranty claims.
Ryobi Warranty Coverage
Ryobi’s warranty generally covers defects in materials and workmanship under normal use. This doesn’t include wear and tear‚ misuse‚ or unauthorized repairs. The standard warranty period varies by product‚ so check your specific drill’s documentation. Proper maintenance‚ as outlined in this manual‚ is essential for valid claims.
Registering Your Drill
Registering your Ryobi drill is crucial for warranty validation and receiving important product updates. You’ll need the model number‚ readily found on the tool itself. Visit the official Ryobi website to complete the online registration form. Keep your purchase receipt as proof of date‚ essential for any warranty claims.
Technical Specifications
Ryobi drills boast varied voltage and amperage‚ depending on the model. The flagship PBLHM102 operates on 18V. Chuck size dictates bit capacity; most Ryobi drills utilize a 1/2-inch chuck. Refer to your specific model’s documentation for precise details regarding these specifications‚ ensuring optimal performance and safety.
Voltage & Amperage Details
Ryobi drills offer a range of voltages‚ primarily within the 18V One+ system‚ though some older models may differ. Amperage hours (Ah) determine runtime; higher Ah equates to longer use. The PBLHM102‚ for example‚ utilizes 18V. Always verify your drill’s specific voltage and Ah rating on its label.
Chuck Size & Capacity

Ryobi drills commonly feature a 1/2-inch chuck‚ accommodating a wide variety of drill bits. Some models may offer keyless chucks for quick bit changes‚ while others require a chuck key. Capacity refers to the largest bit diameter the chuck can securely hold‚ typically up to 1/2 inch.
Finding Replacement Parts
Locating Ryobi drill replacement parts begins with identifying your specific model number. Parts diagrams are often available online through the Home Depot website or Ryobi’s official support channels. Once identified‚ components can be ordered directly from Home Depot‚ authorized Ryobi service centers‚ or online retailers specializing in power tool parts.
Locating Parts Diagrams
Ryobi provides detailed parts diagrams to assist with identifying the correct replacement components for your drill. These diagrams are typically accessible through the Home Depot website by searching for your drill’s model number. Alternatively‚ Ryobi’s official support website may offer downloadable diagrams‚ ensuring accurate part identification for repairs.
Ordering Replacement Components
Once you’ve identified the necessary part using the diagrams‚ you can order replacements primarily through The Home Depot‚ either online or in-store. Ryobi’s website may also direct you to authorized service centers. Ensure you have your drill’s model number handy during the ordering process for compatibility.
Ryobi Drill Model Number Breakdown (Example: PBLHM102)
Understanding the Ryobi model code‚ like PBLHM102‚ is crucial. The letters denote the tool type (PBL – Power Brushless Hammer Drill). Numbers indicate specific features and generation. Decoding this helps identify capabilities and ensures you order the correct replacement parts or accessories for your specific drill.
Decoding the Model Code
Ryobi’s model codes offer valuable insights. Prefixes like ‘P’ signify power tools‚ while subsequent letters detail the tool’s function – ‘BL’ often indicates brushless motor technology. Numbers represent variations within a series‚ denoting feature sets and improvements. Knowing this structure simplifies identifying drill specifications and compatibility.
Understanding Feature Indicators in the Model Number
Analyzing a Ryobi model number‚ like PBLHM102‚ reveals key features. ‘HM’ denotes a hammer drill‚ while ‘102’ signifies a specific configuration within that category. These indicators help determine capabilities like variable speed‚ clutch settings‚ and whether it’s part of the One+ system‚ aiding informed purchasing decisions.