
Century 9-stage chargers offer advanced battery recovery and maintenance. These chargers utilize a multi-step process‚ optimizing performance and extending battery lifespan‚ as detailed in comprehensive manuals.
What is a Century 9 Stage Battery Charger?
Century 9 Stage Battery Chargers represent a sophisticated approach to battery maintenance and restoration. Unlike traditional chargers‚ these devices don’t simply deliver a constant current; instead‚ they employ a nine-step charging profile meticulously designed to analyze battery condition and adapt the charging process accordingly. This intelligent system begins with a desulfation phase‚ breaking down lead sulfate crystals that hinder performance.
Subsequently‚ it progresses through bulk‚ absorption‚ and equalization stages‚ ensuring a full and balanced charge. Crucially‚ the charger incorporates storage‚ refresh‚ and float phases to maintain optimal battery health over extended periods. The manual details each stage‚ explaining its purpose and the corresponding battery response. These chargers are suitable for various battery types – lead-acid‚ AGM‚ and gel – offering versatility and maximizing battery longevity. Understanding the nuances of each stage‚ as outlined in the user manual‚ is key to unlocking the charger’s full potential.
Benefits of Using a 9-Stage Charger
Employing a Century 9-Stage Battery Charger delivers substantial advantages over conventional charging methods. The primary benefit lies in its ability to revive sulfated batteries – a common issue leading to reduced capacity and lifespan. The manual emphasizes the desulfation stages‚ effectively reversing this process. Beyond recovery‚ these chargers optimize charging efficiency‚ reducing energy waste and charging times.
Furthermore‚ the multi-stage process minimizes gassing and heat generation‚ enhancing battery safety and longevity. The charger’s intelligent algorithms prevent overcharging‚ a frequent cause of battery damage. The manual details how the float and storage stages maintain batteries at peak condition during periods of inactivity. Ultimately‚ a 9-stage charger extends battery life‚ reduces replacement costs‚ and ensures reliable performance‚ making it a worthwhile investment for any battery-dependent system. Proper usage‚ guided by the manual‚ unlocks these benefits.

Understanding the 9 Charging Stages
Century 9-stage chargers employ a sophisticated process‚ detailed in the manual‚ to optimally charge batteries. Each stage addresses specific battery needs for recovery and maintenance.
Stage 1: Desulfation
Stage 1‚ Desulfation‚ is the initial phase in the 9-stage charging process‚ as outlined in the Century charger manual. This stage focuses on reversing the buildup of lead sulfate crystals on the battery plates. These crystals form during discharge and prolonged periods of inactivity‚ hindering the battery’s ability to accept and hold a charge.
The charger applies a low‚ controlled current with a specific voltage to gently break down these sulfate deposits. This isn’t an instant process; it requires time and patience. The manual emphasizes that the duration of this stage depends on the severity of the sulfation. Heavily sulfated batteries will require a longer desulfation period.
Importantly‚ the manual cautions against attempting to rapidly desulfate a battery‚ as this can generate excessive heat and potentially damage the battery. The Century charger’s intelligent algorithm carefully monitors the battery’s response and adjusts the current accordingly‚ ensuring a safe and effective desulfation process. Successful desulfation restores the battery’s capacity and improves its overall performance.
Stage 2: Soft Desulfation
Stage 2‚ Soft Desulfation‚ builds upon the initial desulfation process‚ as detailed in the Century charger manual. While Stage 1 tackles heavy sulfation‚ this stage addresses remaining‚ less severe deposits. It employs a refined‚ gentler approach to continue breaking down sulfate crystals without risking damage to the battery plates.
The manual explains that this stage utilizes a pulsating current‚ which is believed to be more effective at dissolving sulfate formations than a constant current. The pulsating action creates micro-vibrations that help dislodge the crystals. The voltage and current levels are carefully controlled and are lower than those used in Stage 1.
The duration of Soft Desulfation is also variable‚ determined by the battery’s condition. The charger’s algorithm continuously monitors the battery’s voltage and current acceptance‚ adjusting the process as needed. The manual stresses that this stage is crucial for maximizing battery recovery and ensuring optimal performance before proceeding to the bulk charging phase.
Stage 3: Bulk Charge
Stage 3‚ Bulk Charge‚ represents the primary charging phase‚ as outlined in the Century 9-stage charger manual. Following successful desulfation‚ the charger delivers a high-current charge to rapidly restore the battery’s capacity. This stage aims to bring the battery voltage up to approximately 80-90% of its full charge level.
The manual details that the charger operates at its maximum amperage during Bulk Charge‚ prioritizing speed. However‚ the voltage is carefully regulated to prevent overcharging. The charger continuously monitors the battery’s voltage and adjusts the current accordingly‚ tapering it off as the battery approaches full charge.
The duration of this stage depends heavily on the battery’s initial state of discharge and its capacity. A deeply discharged battery will require a longer Bulk Charge period. The manual emphasizes that this stage is essential for quickly replenishing lost energy and preparing the battery for the subsequent absorption phase‚ ensuring efficient and complete charging.
Stage 4: Absorption Charge
Stage 4‚ Absorption Charge‚ is a critical phase detailed in the Century 9-stage charger manual‚ following the Bulk Charge. Here‚ the charger maintains a constant voltage while the current gradually decreases. This stage focuses on fully charging the battery – reaching 100% capacity – without causing damage from overvoltage.
The manual explains that during Absorption‚ the remaining energy is carefully forced into the battery cells. As the battery nears full charge‚ the acceptance of current diminishes‚ leading to a tapering effect. The charger continues to hold the constant voltage for a predetermined period‚ ensuring all cells are completely saturated.
The duration of Absorption Charge is typically determined by the battery type and its capacity‚ as specified in the manual’s charging profiles. This stage is vital for maximizing battery lifespan and performance‚ preparing it for long-term storage or immediate use. Proper absorption ensures optimal energy density and reduces the risk of sulfation.
Stage 5: Condition Phase
Stage 5‚ the Condition Phase‚ as outlined in the Century 9-stage charger manual‚ is a unique and vital step for battery health. This phase isn’t always present in all chargers‚ highlighting the advanced capabilities of the Century system. It’s designed to gently discharge the battery to a specific voltage‚ then immediately recharge it.
The manual details that this controlled cycle helps to equalize the voltage across all cells within the battery. This equalization process identifies and addresses weaker cells‚ improving overall battery capacity and performance. By briefly discharging and recharging‚ the Condition Phase stimulates the battery internally.
This stimulation helps to break down any internal resistance and reduce stratification of the electrolyte. The manual recommends using this phase periodically‚ especially for batteries that have been deeply discharged or stored for extended periods. It’s a proactive step towards maximizing battery lifespan and ensuring consistent power delivery.
Stage 6: Storage Phase
The Storage Phase‚ detailed in the Century 9-stage charger manual‚ is crucial for batteries not in regular use. This phase maintains the battery at an optimal voltage – typically around 12.8V – minimizing self-discharge and preventing sulfation during prolonged inactivity. The manual emphasizes this phase is superior to simply disconnecting the battery.
Unlike a full float charge‚ the Storage Phase delivers a very low current‚ just enough to counteract the natural self-discharge rate. This gentle approach avoids overcharging and extends the battery’s lifespan significantly. The manual recommends engaging this phase whenever a battery will be stored for more than a few weeks.
Regularly checking the battery while in Storage Phase‚ as described in the manual‚ ensures it remains topped up. This proactive maintenance prevents the battery from falling below a critical voltage level‚ which could lead to irreversible damage and reduced capacity. It’s a simple yet effective way to preserve battery health.
Stage 7: Refresh Phase
The Refresh Phase‚ as outlined in the Century 9-stage charger manual‚ is a unique and beneficial stage designed to counteract the effects of prolonged inactivity or infrequent use. This phase employs a slightly higher voltage than the Storage Phase‚ gently stimulating the battery and reversing minor sulfation that may have begun to form on the plates.
The manual details that the Refresh Phase isn’t a rapid charge; it’s a controlled process that takes several hours‚ depending on the battery’s condition. It’s particularly effective for batteries that have been stored for extended periods or have experienced deep discharges. This phase helps restore lost capacity and improve overall performance.
The charger’s manual recommends utilizing the Refresh Phase periodically‚ even for batteries in regular use‚ as a preventative measure. It’s a proactive step to maintain optimal battery health and ensure consistent performance. Regular refreshing can significantly extend the battery’s usable lifespan and reduce the need for replacement.
Stage 8: Equalization
The Equalization stage‚ detailed within the Century 9-stage charger manual‚ is a crucial process for flooded lead-acid batteries. It involves a controlled overcharge‚ raising the voltage to a higher level than typically used during absorption. This action breaks down sulfation crystals that accumulate on the battery plates over time‚ restoring capacity and balance between cells.
The manual emphasizes that equalization isn’t suitable for all battery types – specifically‚ it should not be used with sealed lead-acid (SLA) or gel batteries. For flooded batteries‚ it’s recommended periodically‚ typically after prolonged discharge or when cell voltages differ significantly; This process generates gases‚ requiring adequate ventilation.
The charger’s manual provides specific guidance on equalization duration‚ varying based on battery size and sulfation level. It’s a powerful restorative phase‚ but improper use can damage the battery. Following the manual’s instructions precisely is vital for safe and effective equalization‚ maximizing battery life and performance.
Stage 9: Float Charge
The Float Charge stage‚ as outlined in the Century 9-stage charger manual‚ represents the final phase of the charging cycle. Once the battery reaches full charge‚ the charger reduces the voltage to a lower‚ maintenance level – typically around 13.2-13.8 volts. This sustains a 100% charge without overcharging or causing gassing.
The manual details that float charging is designed for batteries that are fully charged but remain connected to the charger for extended periods. It compensates for self-discharge‚ ensuring the battery remains ready for immediate use. This is particularly beneficial for batteries powering critical systems or infrequently used equipment.
The Century charger’s manual stresses the importance of maintaining the float voltage within the recommended range. Too high a voltage can lead to electrolyte loss and plate corrosion‚ while too low a voltage allows the battery to slowly discharge. Consistent float charging‚ guided by the manual‚ maximizes battery lifespan and reliability.
Manual Operation & Safety Features
The Century 9-stage charger manual details step-by-step operation‚ emphasizing correct connection procedures and crucial safety precautions to prevent damage or injury during use.
Connecting the Charger to the Battery
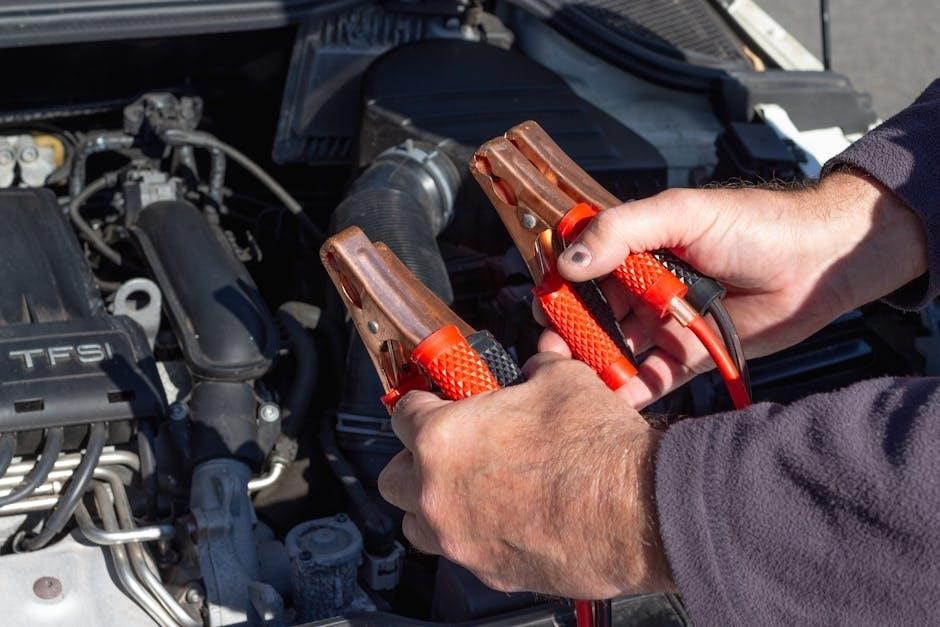
Before connecting‚ ensure the battery is in a well-ventilated area‚ free from flammable materials. Consult the Century 9-stage charger manual for specific instructions related to your model. Begin by inspecting the battery terminals for corrosion; clean them if necessary using a wire brush or a specialized terminal cleaning tool.
Connect the red (positive) clamp to the positive terminal of the battery‚ usually marked with a “+” symbol. Then‚ connect the black (negative) clamp to the negative terminal‚ typically marked with a “-” symbol or the chassis ground. Ensure a firm and secure connection to avoid sparking or poor charging.
Double-check the polarity before powering on the charger – reversed polarity can cause severe damage to both the charger and the battery. Once connected‚ plug the charger into a grounded AC outlet. The manual will detail the indicator lights and their meanings‚ confirming a successful connection and initiating the charging process. Always disconnect the charger from the AC outlet before disconnecting the clamps from the battery.
Polarity Considerations (Positive/Negative)
Crucially‚ the Century 9-stage charger manual emphasizes the importance of correct polarity. Connecting the charger with reversed polarity – positive to negative and vice versa – can inflict irreversible damage to the charger’s internal circuitry and potentially harm the battery itself. This can also create a hazardous situation‚ including sparking and potential fire risk.

Always verify the battery terminals before connecting the clamps. The positive terminal is typically marked with a “+” symbol‚ often red in color‚ while the negative terminal is marked with a “-” symbol‚ usually black. The charger’s clamps are correspondingly colored: red for positive and black for negative.
Double-check your connections before plugging in the charger. If unsure‚ consult the manual’s diagrams. A momentary lapse in attention can lead to costly mistakes. The manual also details procedures for dealing with accidental reversed polarity connections‚ though prevention is always the best course of action. Prioritize safety and accuracy during this critical step.
Safety Precautions & Warnings
The Century 9-stage charger manual prominently features several critical safety precautions. Never operate the charger in a confined space without adequate ventilation‚ as batteries release explosive gases during charging. Keep sparks‚ flames‚ and smoking materials away from the battery during the process.
Always wear appropriate eye protection (safety glasses or goggles) to shield against potential acid splashes. Avoid contact with battery acid; if contact occurs‚ immediately flush the affected area with copious amounts of water and seek medical attention. Do not disassemble the charger; it contains high-voltage components.
Ensure the charger is connected to a properly grounded outlet. Do not use extension cords unless absolutely necessary‚ and if used‚ ensure they are of sufficient gauge to handle the charger’s current draw. The manual warns against charging damaged batteries and stresses the importance of disconnecting the charger before inspecting or cleaning it. Prioritize personal safety at all times.
Troubleshooting Common Issues
The Century 9-stage charger manual details solutions for typical problems. These include checking power connections‚ verifying battery polarity‚ and interpreting error codes for swift resolution.
Charger Not Turning On
If your Century 9-stage battery charger fails to power on‚ consult the manual for systematic troubleshooting. First‚ verify the AC power cord is securely connected to both the charger and a functioning wall outlet. Test the outlet with another device to confirm it’s delivering power.
Next‚ inspect the charger’s fuse – the manual will detail its location and appropriate replacement amperage. A blown fuse indicates a potential internal issue. Ensure the battery connection cables are properly attached‚ even if the unit isn’t attempting to charge; a short circuit can sometimes prevent startup.
Review the manual’s section on indicator lights; a lack of any illumination suggests a more significant internal fault. Do not attempt to disassemble the charger yourself; this will void the warranty and could pose a safety hazard. Contact customer support‚ referencing the model number and a detailed description of the problem‚ as outlined in the manual’s support information.
Battery Not Charging
If the Century 9-stage charger connects but doesn’t initiate charging‚ the manual recommends checking several key areas. First‚ confirm correct polarity – red to positive (+)‚ black to negative (-). Reversed polarity can trigger safety shutdowns. Verify the battery voltage is within the charger’s supported range‚ detailed in the specifications section of the manual.
A deeply discharged or sulfated battery may require the desulfation stages to run for an extended period before bulk charging begins; consult the manual’s stage descriptions. Inspect the battery terminals for corrosion or damage‚ as poor contact impedes current flow. Ensure the charger’s selected battery type matches the battery being charged (e.g.‚ AGM‚ Gel‚ Wet).
The manual’s troubleshooting guide may list specific error codes displayed on the charger’s screen‚ indicating the issue. If the problem persists‚ refer to the warranty information and contact customer support for assistance‚ providing the model number and a detailed description of the symptoms.
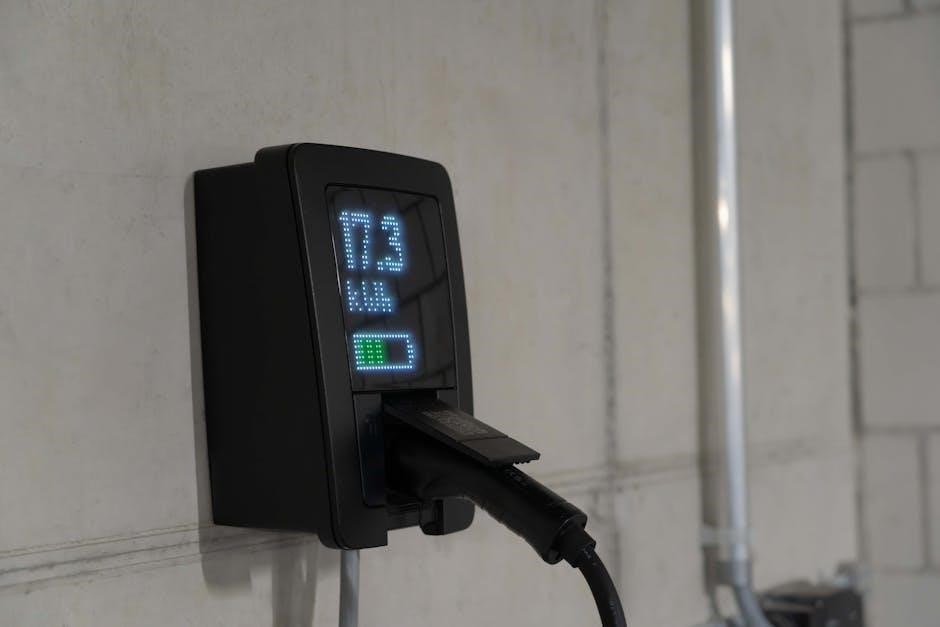
Error Codes & Their Meanings
The Century 9-stage charger’s manual dedicates a section to interpreting error codes displayed on the LCD screen. Code “E1” typically indicates a reversed polarity connection – immediately disconnect and correct the wiring. “E2” suggests an over-voltage situation‚ potentially due to an incompatible battery type selection; verify the settings.
“E3” often signals a short circuit‚ requiring inspection of the cables and battery terminals for damage. A “E4” code may point to a faulty battery cell‚ rendering it unable to accept a charge. “E5” usually indicates a temperature issue – the charger may shut down if the ambient temperature is outside the operational range‚ as detailed in the manual’s specifications.
The manual stresses that ignoring error codes can lead to battery damage or charger malfunction. If an unfamiliar code appears‚ consult the manual’s comprehensive list or contact customer support with the specific code for accurate diagnosis and resolution. Always prioritize safety when troubleshooting.

Maintenance & Storage
The Century 9-stage charger manual recommends regular cleaning with a damp cloth. Store the charger in a cool‚ dry place‚ away from direct sunlight and extreme temperatures for longevity.
Cleaning the Charger
Maintaining the cleanliness of your Century 9-stage battery charger is crucial for optimal performance and longevity. Always disconnect the charger from the mains power supply before commencing any cleaning procedures. Refer to your Century 9-stage battery charger manual for specific guidance‚ but generally‚ a soft‚ damp cloth is sufficient for removing dust and grime from the charger’s casing.
Avoid using abrasive cleaners‚ solvents‚ or excessive water‚ as these can damage the internal components or the exterior finish. Pay particular attention to the charging leads and clamps; wipe them down to remove any corrosion or residue. Ensure these are completely dry before reconnecting to a battery. Do not immerse the charger in water or any other liquid.
Regularly inspect the charging cables for any signs of damage‚ such as fraying or cracking. If damage is detected‚ replace the cables immediately to prevent electrical hazards. A clean charger operates more efficiently and safely‚ ensuring reliable battery charging for years to come. Following these simple cleaning steps‚ as outlined in the manual‚ will contribute to the charger’s overall lifespan.
Proper Storage Procedures
Storing your Century 9-stage battery charger correctly when not in use is vital for maintaining its functionality and extending its lifespan. Consult your Century 9-stage battery charger manual for detailed instructions‚ but generally‚ the charger should be stored in a cool‚ dry‚ and well-ventilated location. Avoid areas exposed to extreme temperatures‚ humidity‚ or direct sunlight.
Before storing‚ ensure the charger is completely dry and free from dust or debris. Coil the charging cables neatly and secure them to prevent damage. It’s recommended to store the charger in its original packaging‚ if available‚ or in a protective bag or container. Keep the charger out of reach of children and pets.
Periodically check the stored charger for any signs of corrosion or damage. If the charger will be stored for an extended period‚ it’s advisable to connect it to a power source briefly every few months to maintain battery health within the unit itself. Following these storage guidelines‚ as detailed in the manual‚ will ensure your charger is ready for use whenever you need it.